
MIRO ALTITUDE
2D CAD file (PDF)
- 10252-
- English
Touchscreen display device for power & energy measurement. Single-channel.
With the latest firmware update (V1.01.04), MIRO ALTITUDE is now compatible with Gentec-EO's INTEGRA (USB) series.
*Except QE8 and PE detectors
10” high-resolution, anti-glare touchscreen, just like one would expect nowadays for a professional work tool.
With its modern and intuitive user interface, MIRO ALTITUDE is so simple to use that it is literally plug-and-play. It was designed to take full advantage of its larger-than-life screen so you can see at a glance all that matters to your measurement at all times.
Remarkably strong and durable metal casing that you won’t be afraid to break in the field or during transportation.
Support for analog output and external trigger, as well as USB keys to log data.
MIRO ALTITUDE has 3 display modes, including one that lets you time-travel to check past data points without interrupting the current measurement session, and another mode with extra large size digits that you can view from across the room.
Measure up to 10x faster (detector-dependant) with XNR AnticipationTM, which is probably the fastest measuring capability ever brought to a measurement instrument in this industry.
View a recorded measurement session directly on your MIRO ALTITUDE.
Save and organize your recorded measurement sessions and screenshots or move your files to your USB stick.
MIRO ALTITUDE is compatible with almost all Gentec-EO power and energy detectors with the standard DB15 output.
*Except QE8 detectors

USB cable for MIRO ALTITUDE.

Carrying sleeve for MIRO ALTITUDE.

Power supply, 12 V, for MIRO ALTITUDE.

Calibration certificate
MIRO ALTITUDE transport box
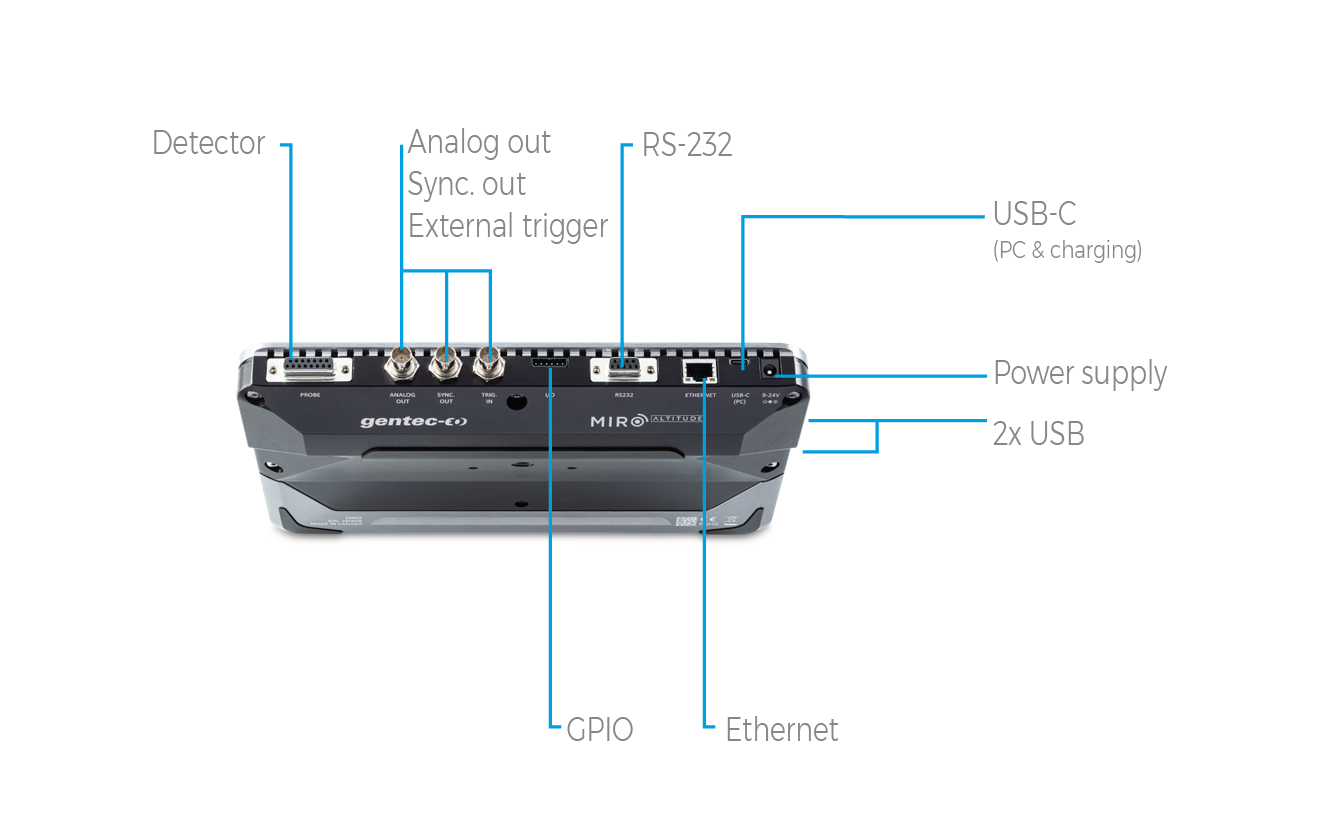
MIRO ALTITUDE is Gentec-EO’s new flagship meter for reading your laser power and energy measurements.
More than an evolution from our current product line, we see it as a revolution in the laser beam measurement industry that helps engineers and service technicians increase their productivity thanks to numerous new features in both hardware and software.
Supercharge your productivity with an intuitive user interface, an extra large screen, tons of connectivity possibilities, 3 convenient display modes, a built-in dataviewer and a built-in file manager.
Enter modern times of laser beam measurement with MIRO ALTITUDE.
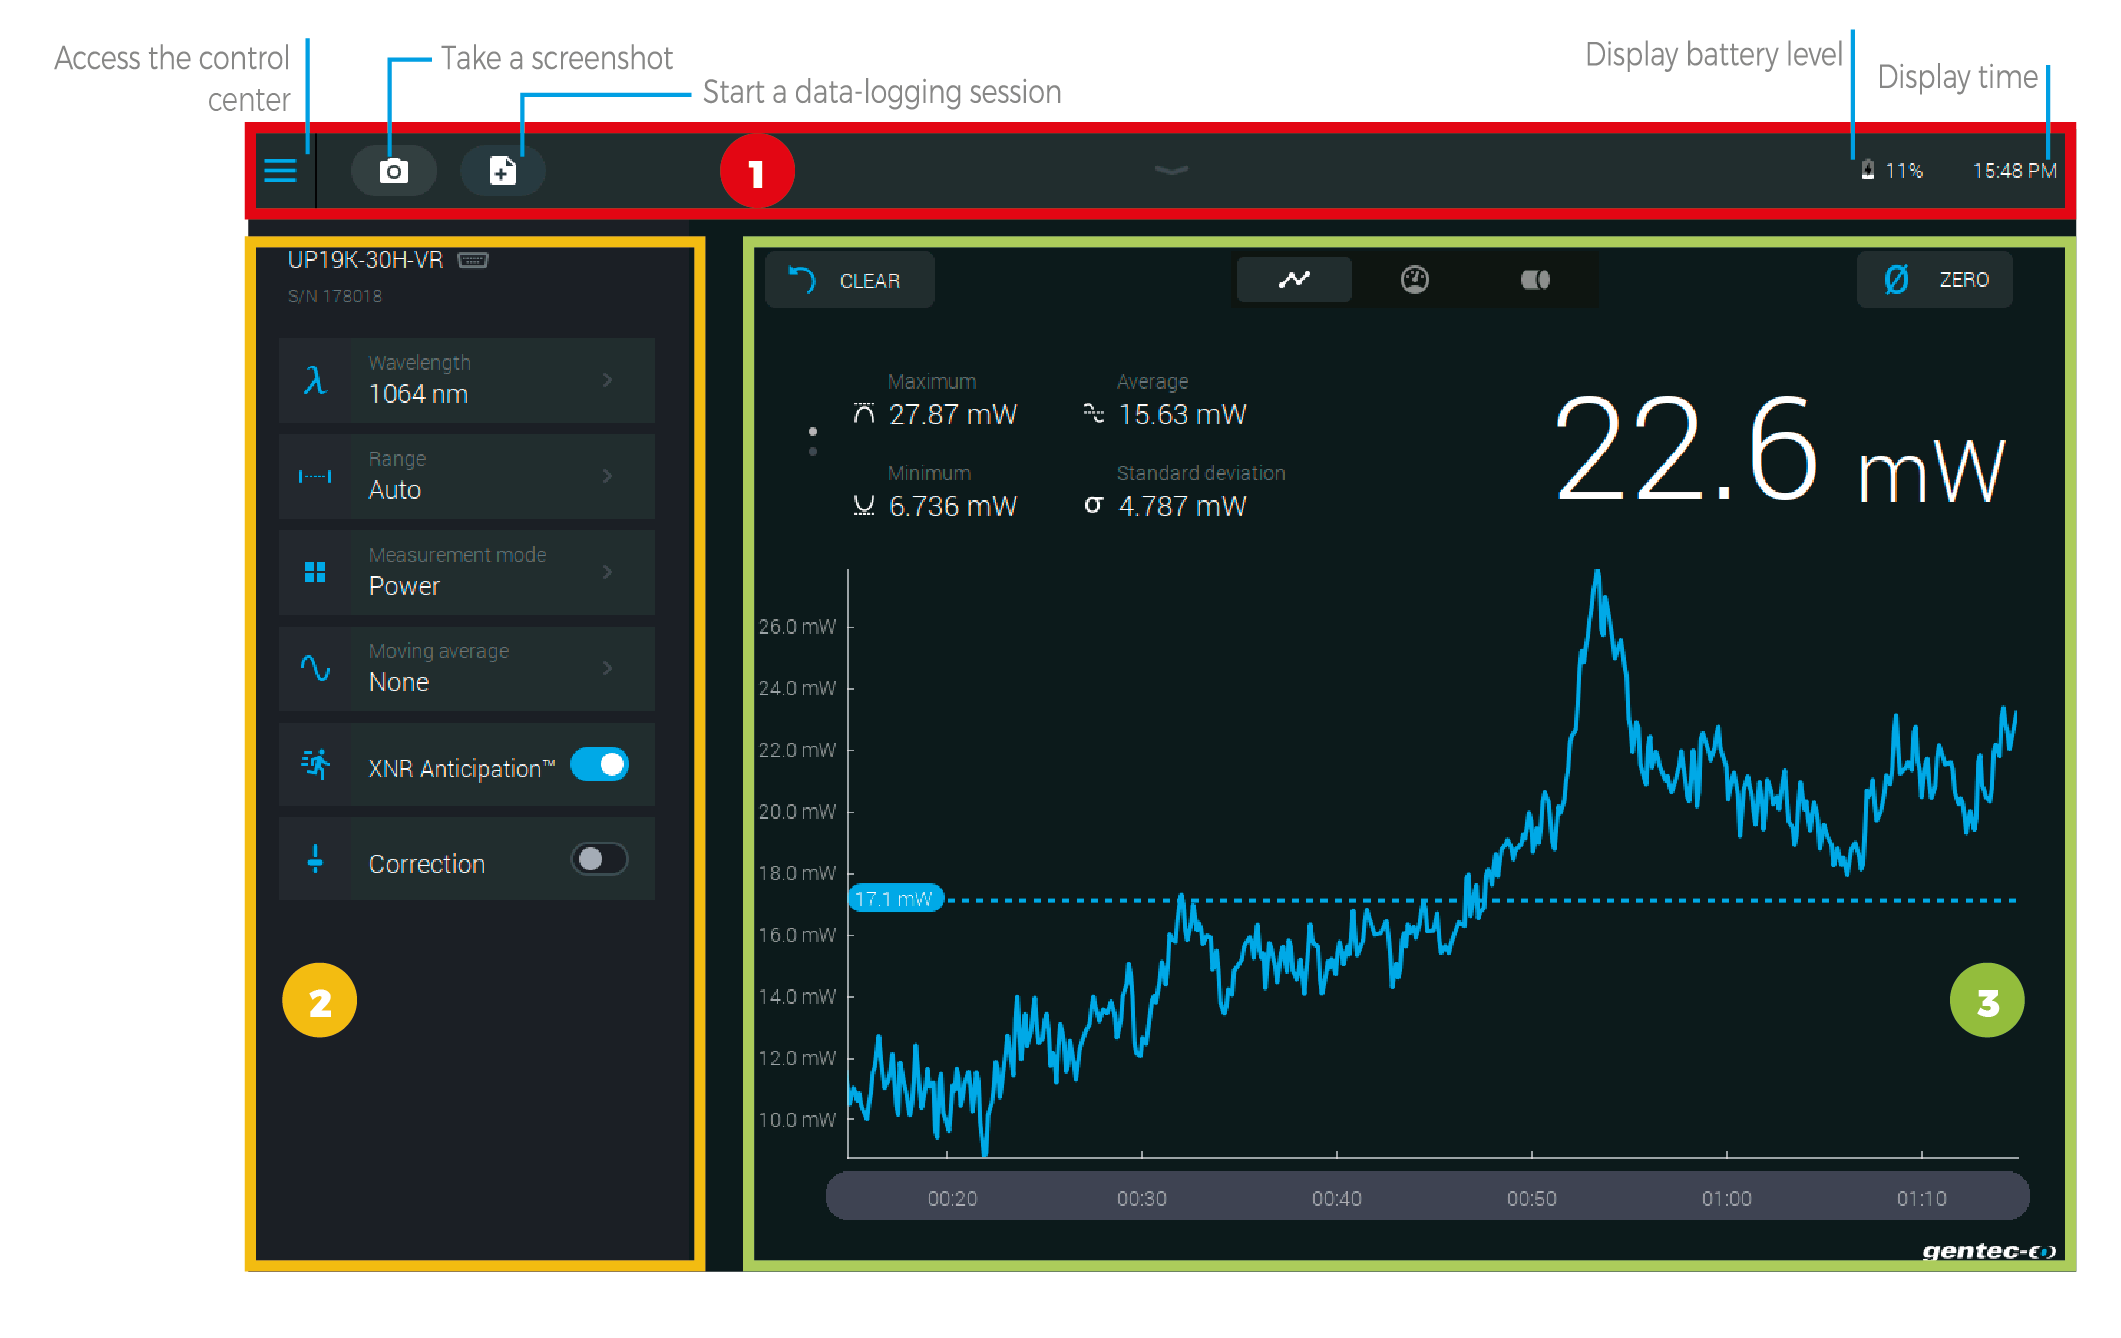
The upper part of the screen includes a direct access to the control center, data acquisition buttons and various indicators (battery level and time).
Use the various measurement settings available for your detector to set everything related to your measurement.

Wavelength: Enter your wavelength or choose from a list of recently used wavelengths

Range: Set the measuring range to autoscale or to one of the standard values

Measurement mode: Choose what you want to measure: power, SSE, moving average, etc.

Moving average: Choose the desired moving average to use to plot the chart

Trigger: Enter the desired trigger level or choose from a list of recently used values

XNR AnticipationTM: Toggle on to measure up to 10x-20x faster without losing any significant accuracy in your readings

Correction: Set a multiplier and an offset value for your measurement

Attenuator: Toggle when using a Gentec-EO calibrated attenuator with your detector
The top part of the display area is the same for all three display modes.

Clear: Use this button to reset the statistics and erase the scope graph’s data

Zero: Set the current measured value to zero
Display mode: Toggle your display mode between: scope, needle and bar chart

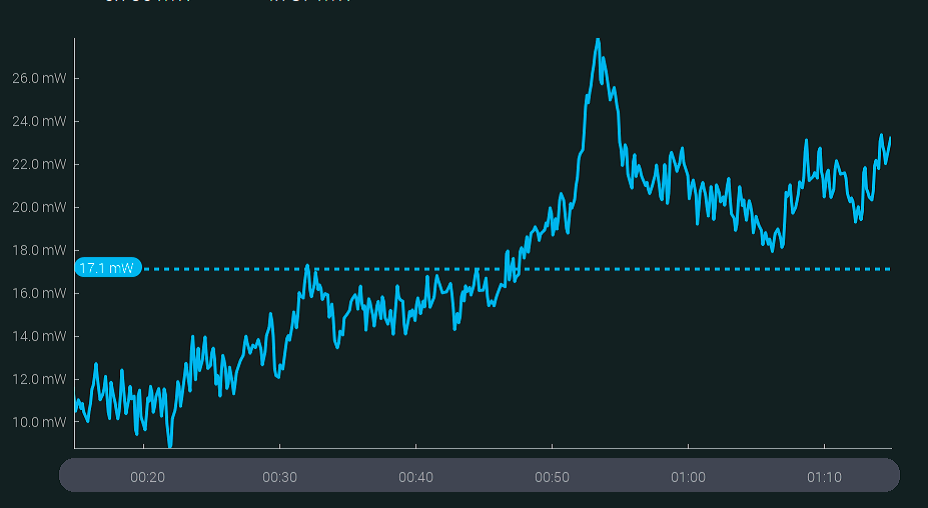
With this display mode, you can travel in time using the time line at the bottom to view measurements at any point in time while MIRO ALTITUDE continues to measure.
The dotted blue line shows the average value.
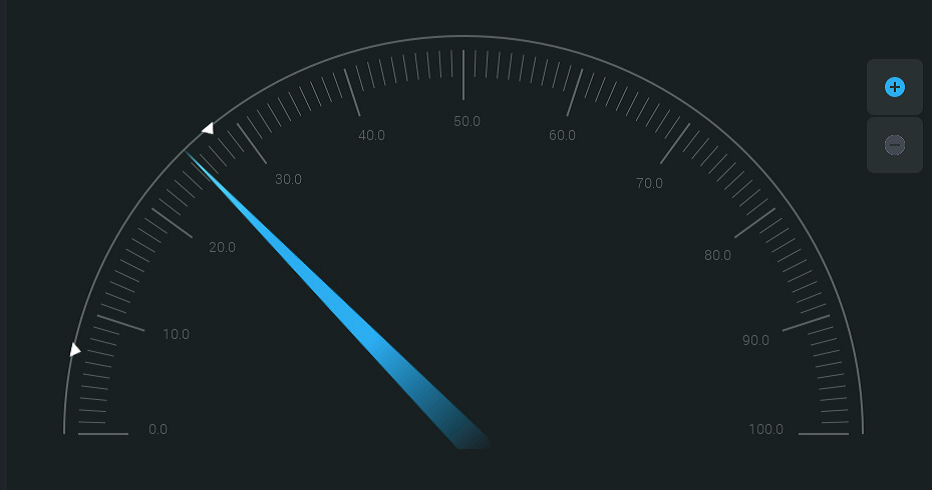
Faster than an analog needle thanks to XNR AnticipationTM! This mode is particularly useful when tuning a laser. The real-time value and statistics are always visible at the top of the screen.
Arrows indicate the minimum and maximum measured values since the last reset. The zoom function sets these values as full scale of the digital gauge.
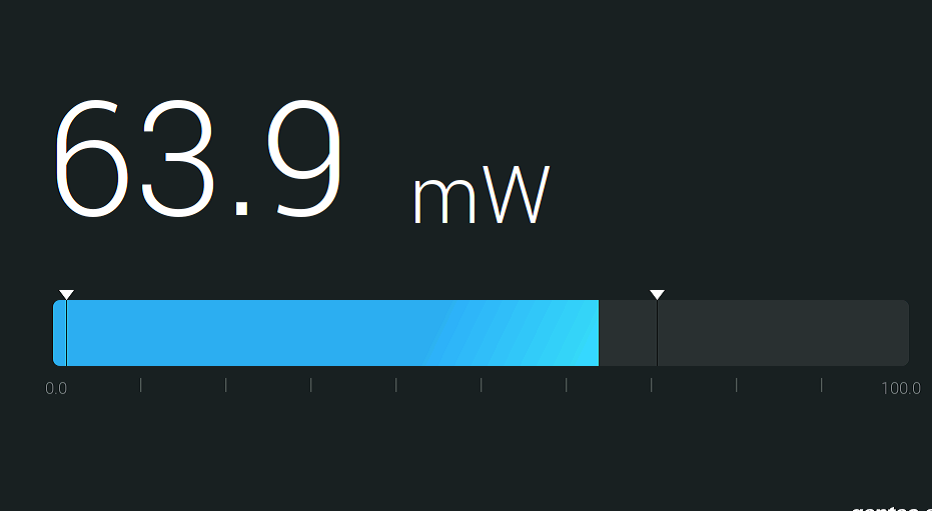
This is the simplest display mode. Its main advantage is that the current measured value is displayed in huge size, allowing you to read the measurement from a good distance.
Arrows indicate the minimum and maximum measured values.

MIRO’s built-in file manager lets you access and organize all your screenshots and recorded measurement sessions. You can also copy files on your USB key.
There is also a built-in image viewer so you can view your screenshots directly on your MIRO ALTITUDE.

Visualize a recorded measurement session with our built-in data viewer. Data will be displayed in the scope chart display.
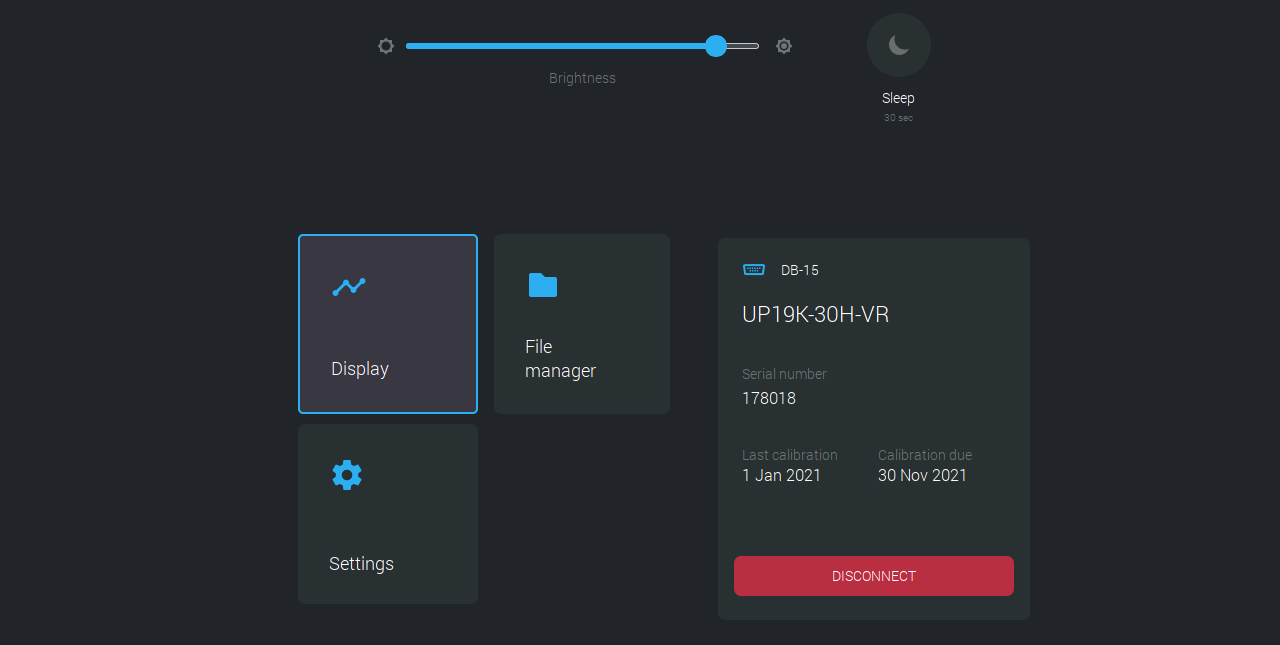
The control center is accessible from all screens in the top left corner.
Connect/disconnect your Gentec-EO detector to MIRO ALTITUDE
Easily navigate between the main screens of the app:

Display

File manager

Settings for the device.
*Does not include shipping fees, import fees or local representation. Request quote for full details and local sales contact.
You might need these specific products to be able to use the placeholder only.
No compatible product