PRONTO-Si

P/N 202963

Portable photodiode-based laser power meter for up to 800 mW.

    • 19 mm Ø
    • 55 mm Ø
    • 10 x 10 mm
    • Silicon (up to 800 mW)
    • H - Standard (up to 10 kW)
    • H - Standard (up to 250 W)
    • H - Standard (up to 3 kW)
    • H - Standard (up to 500 W)
    • H - Standard (up to 6 kW)
    • W - Very high power density
    • Power
    • Energy
    • Power and Energy
PRONTO-Si PRONTO-Si

Traceable calibration:

Logo nist

Product family key features

Pocket-Size

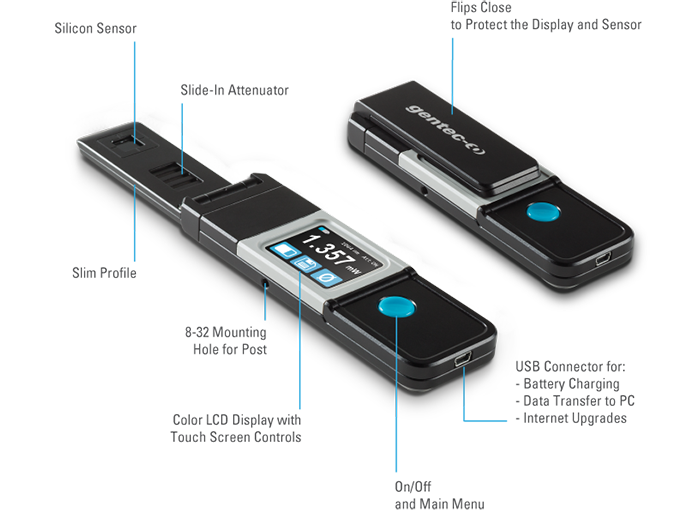
This low power laser probe is so compact it fits in your pocket!

Slim Profile

The sensor part is only 6 mm thick, allowing it to fit into tight spaces

Easy-to-Use

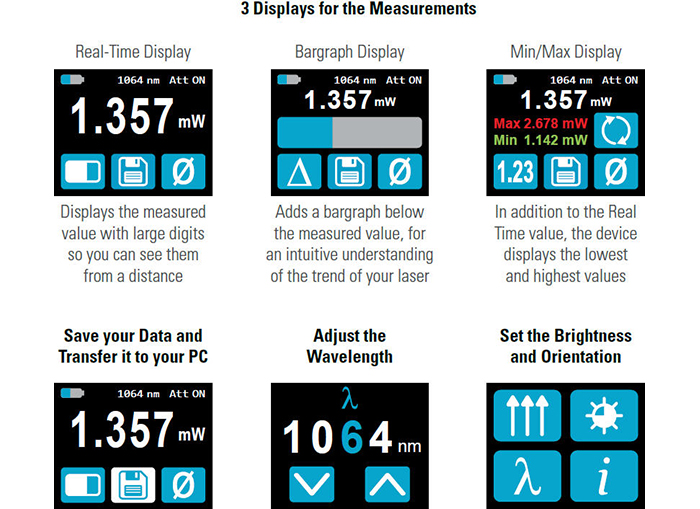
The touch screen color LCD allows for a friendly user interface. You can make a measurement with just the touch of a button!

Very Low Power Measurements

Thanks to its very low noise level of only 10 pW, the PRONTO-SI measures powers as low as 0.3 nW

Slide-In Attenuator

Just slide the OD1 integrated filter to the "on" position and you can measure up to 800 mW of continuous power.

User Settable

You can set the wavelength, brightness and screen orientation to adapt to your application.

Data Logging

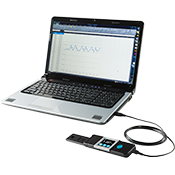
Save your data to the internal memory and then transfer it to your PC over the USB connection

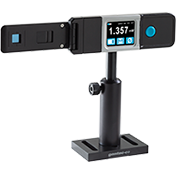
Compatible stand

Included

  • MAE-USB MAE-USB

    USB cable for MAESTRO, U-LINK (USB), and PRONTO.

  • Calibration certificate

  • Transport case

  • Personal wavelength correctionTM Certificate

Measurement capabilities

  • Maximum average power1

    800 mW
  • Minimum average power

    200 pW
  • Noise equivalent power

    10 pW
  • Spectral range

    320 - 1100 nm
  • Power calibration uncertainty2

    ±6.0 % (320 - 399 nm)
    ±2.0 % (400 - 449 nm)
    ±1.5 % (450 - 809 nm)
    ±2.0 % (810 - 899 nm)
    ±4.0 % (900 - 1009 nm)
    ±7.5 % (1010 - 1100 nm)
  • Exposure time

    0.2 s
  • Attenuator

    Integrated Slide-In OD1 Attenuator
  • Minimum repetition rate

    100 Hz
    • 1. At 532 nm, with attenuator. See curves for maximum power at other wavelengths.
    • 2. See user manual for calibration uncertainty with attenuator.

Continuous power mode

  • Response time

    0.2 s

Damage thresholds

  • Maximum average power density

    100 W/cm²

Controller and GUI specifications

  • Battery type

    Rechargeable Li-ion
  • Battery life

    17 hours or 4,200 measurements (with brightness set at 25%)
  • Display resolution

    1 pW
  • Display size

    28.0 x 35.0 mm (128 x 160 pixels)
  • Display type

    Touch Screen Color LCD
  • Backlight

    Adjustable
  • Internet upgrades via

    USB
  • Data storage

    50,000 pts
  • Battery recharge via

    USB

Physical characteristics

  • Aperture width

    10 mm
  • Aperture height

    10 mm
  • Absorber

    Si
  • Dimensions

    41.0W x 216.2L x 15.8D mm
  • Weight

    0.15 kg
  • Mounting holes

    1 x 8-32

CA$1,699.00*

FEATURES

INTUITIVE USER INTERFACE

HANDS-FREE OPERATION

DATA TRANSFER TO PC

Measurement capability in the picowatt level

Photodiode-based detector offering a fast response for VIS-NIR wavelengths. Our silicon absorber makes it possible to measure very low powers down to the picowatt level.

Customers enjoy:

  • Wide dynamic range
  • Very low noise
  • Fast response
  • Not sensitive to the surrounding environment

Leverage serial commands

Use our serial commands to communicate directly with the meter without using Gentec-EO's software. You can do so using a terminal emulator software, like PuTTY, or you can just integrate them directly into your own software. All essential functions of the meter are covered by a command. Refer to the user manual of the meter for the list of all commands available.

Benefits:

  • Build your own software
  • Suit your unique laser application requirements
  • Automate your measurements

NIST-TRACEABLE CALIBRATION INCLUDED

Traceable calibration provides the ability to trace the readings of laser output measurements to known international measurement standards determined by the National Institute of Standards and Technology (NIST). This ensures that the measurements taken by the instruments are reliable and accurate.

Benefits include:

  • Make valid comparisons of measurements taken by other instruments inside and outside your organization and over time
  • Comply with regulations or conform to industry standards
  • Avoid costly measurement mistakes in your operations
  • Improve customer confidence in your laser systems
  • Ensure laboratory experiment validity
  • Demonstrate measurement accuracy easily with the calibration certificate we provide
 

Related videos

All videos

Compatible products you may need

*Does not include shipping fees, import fees or local representation. Request quote for full details and local sales contact.

Your item has been added to your cart!

You might need these specific products to be able to use the placeholder only.

Compatible products

No compatible product

Check if this product works for your laser

Measurement type:

1

Beam size

2

Laser type

3

Beam profile

COPYRIGHT ©2024 Gentec-eo Spektrum média